
Babies don’t come with manuals, but they do come with endless opportunities to learn. One of the most powerful things you can do as a new parent or caregiver is to prepare for the unexpected, like when your little one puts something in their mouth they shouldn't. That's where CPR comes in handy — and it can be a literal lifesaver. Learning infant CPR isn’t about expecting danger around every corner. It’s about gaining confidence, building calm under pressure, and being ready just in case.
Infant CPR skills are something no one hopes to use, but everyone should know. This guide will walk you through everything you need to know and show you how CPR training can empower you to feel secure and capable as a parent.
Recognizing When to Perform CPR on an Infant
When an infant stops breathing or becomes unresponsive, every second matters. The signs can be subtle, so you’ll want to act quickly if:
- The baby is limp or unresponsive
- You can’t detect normal breathing
- Their skin looks bluish or pale
It’s easy to second-guess yourself in the moment, but if there’s any doubt, start CPR! Cardiopulmonary resuscitation (CPR) can help keep oxygen flowing to the brain and other organs until emergency responders arrive.
Safety Precautions Before Starting Infant CPR
Before you begin your superhero moves, take a moment to do a quick safety check.
- Ensure the area is safe. Remove hazards so you can focus fully.
- Do not shake the infant. Shaking can cause serious injury. Gently tap the bottom of the foot to check for responsiveness.
- Prepare to start CPR immediately. Time is precious. Once you’ve confirmed the baby is unresponsive and not breathing normally, it’s go time.
Taking these quick precautions helps you stay focused and avoid causing further harm.
Step-by-Step CPR Procedure for Infants (Under 1 Year Old)
Knowing how to respond in an emergency can make all the difference. This quick-reference guide will help you stay focused and take action fast.
1.Check responsiveness: Tap the baby's foot or shoulder and call their name. If there’s no response or normal breathing, start CPR.
2. Call 911: If alone, do CPR for 2 minutes first, then call. If someone’s with you, have them call right away.
3. Place on flat surface: Place them on their back on a firm, flat surface.
4. Open airway: Gently tilt the head back and lift the chin. Look for any visible blockages in the baby's mouth.
5. Begin chest compressions: Use two fingers below the nipple line. Press down 1.5 inches at 100–120 compressions per minute.
6. Repeat the cycle: Alternate 30 chest compressions with 2 rescue breaths until help arrives or the baby breathes normally again.
With the basics of infant CPR in your back pocket, you're already one step ahead in protecting your little one.
Common Mistakes to Avoid
Even with the best intentions, it’s easy to make a few mistakes during infant CPR.
Pressing too hard or not deep enough when you perform chest compressions, pausing compressions for too long, or blowing too forcefully into the baby’s mouth can all reduce the effectiveness of CPR. Some parents also hesitate to call 911 right away, unsure if the situation truly qualifies as an emergency.
Remember, CPR is about stepping up with confidence, staying calm, and doing your best until help arrives. That’s exactly what CPR training is designed to teach.
How Are Infant CPR Classes Different From Typical CPR Classes?
Infant and child CPR classes focus on techniques designed specifically for babies under one year old. You’ll learn how to use two fingers instead of your full hand for chest compressions, where the compression location is, and how to safely support the baby’s head. These classes also address emergencies more common in infants, like choking or pediatric upper airway obstruction.
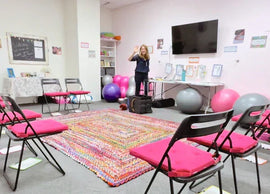
Beyond the techniques, these classes help build confidence. You don’t need to be certified in pediatric advanced life support to respond effectively in an emergency. CPR training at A Mother’s Haven offers hands-on instruction and support, helping parents feel prepared to assist not only infants but also older children undergoing CPR in a crisis.
Little Breaths, Big Peace of Mind
CPR might feel intimidating, but once you have the steps down, it becomes one of the most empowering tools in your parenting toolkit. And guess what? You don’t have to figure it out alone.
A Mother’s Haven offers pediatric CPR classes, as well as newborn care classes, that make learning these skills approachable, encouraging, and easy to practice. Pair it with prenatal care classes or gift one to a friend. You’ll be giving the gift of safety and calm when it matters most. Shop A Mother’s Haven today for expert-led CPR classes and all the support you need.
FAQs
What is the correct hand position for infant CPR?
Use two fingers at the center of the baby's chest, just below the nipple line. Avoid using your whole hand as infants are delicate, and finger compressions are safest.
Where can I learn how to perform CPR on an infant?
A Mother’s Haven offers in-person and online CPR classes tailored for babies. These baby CPR classes cover everything from chest compressions to rescue breathing.
Is infant CPR different from adult CPR?
Yes! Infant CPR uses two fingers instead of hands, smaller rescue breaths, and different airway techniques. That's why it's vital to learn infant-specific methods.
What should I do if the infant starts breathing during CPR?
If the baby begins breathing normally again, stop CPR and place them in the recovery position. Stay close, monitor their breathing, and wait for emergency services to arrive.